-
Configure Services
Now that we have the required packages for MySQL, let’s configure the internal database we will use. If you already have an external MySQL cluster, you can utilize that but remember to open the appropriate ports for communication.
Start Apache and MySQL
sudo systemctl start httpd mariadbEnable Services at Startup
sudo systemctl enable httpd mariadbEnable Firewall Rules
sudo firewall-cmd --add-service=http
sudo firewall-cmd --add-service=https
sudo firewall-cmd --runtime-to-permanent
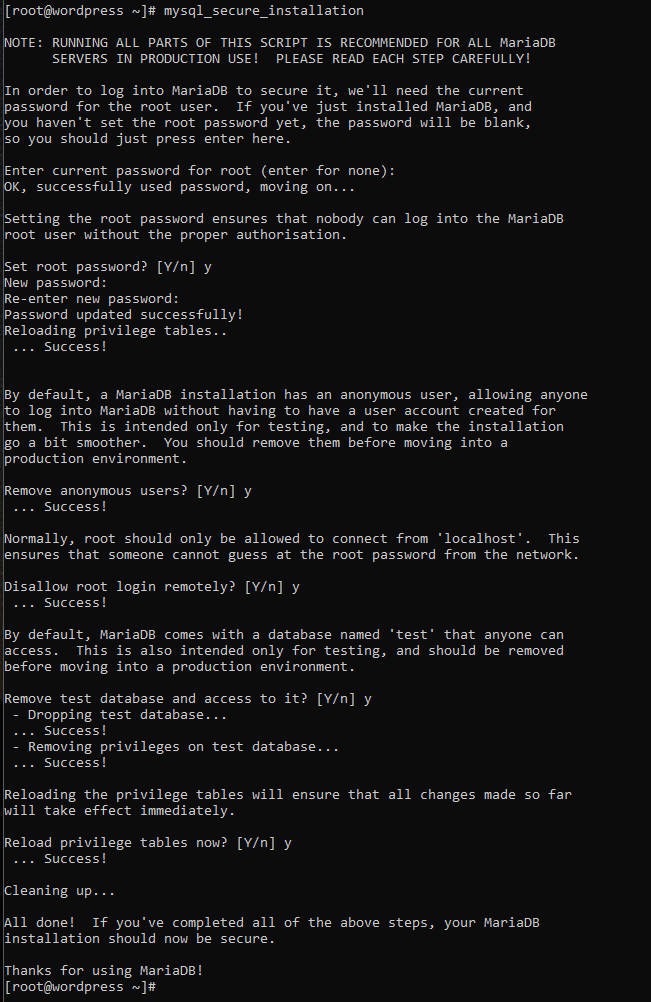
Secure MySQL
mysql_secure_installation
-
Configure MySQL
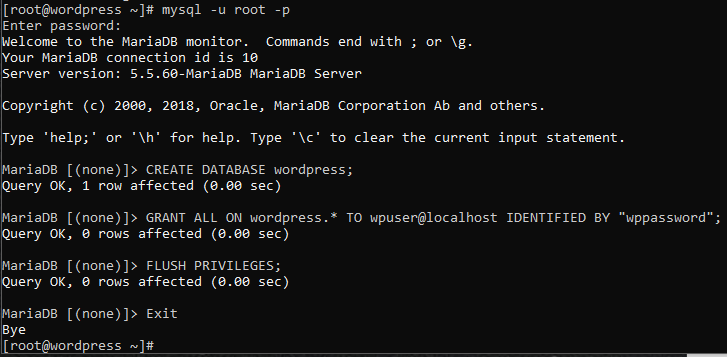
Next, let’s setup our database that we will be using with WordPress.
Login to database with Password configured in Step 3
mysql –u root -pOnce at the MySQL prompt, create the database and user
CREATE DATABASE yourdatabasenamehere;
GRANT ALL ON yourdatabasenamehere.* TO wordpressdbuser@localhost IDENTIFIED BY "wordpressdbpass";
FLUSH PRIVILEGES;
EXIT
-
Installing WordPress
Great, database is done! Now we’re going to install the latest build of WordPress.
Install wget, Export Files to Root Apache (or path of choice)
sudo yum -y install wget
wget http://wordpress.org/latest.tar.gz
tar xfz latest.tar.gz
sudo cp -rf wordpress/* /var/www/html/
sudo rm -rf wordpress
ls /var/www/html/
Modify Site Files
cd /var/www/html/
sudo cp wp-config-sample.php wp-config.php
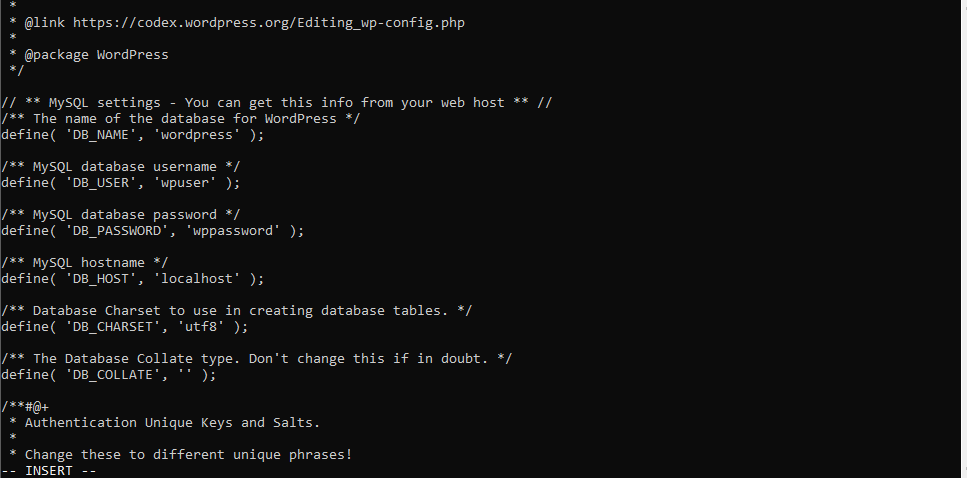
sudo vi wp-config.php
Once you have the wp-config.php open in your editor, enter the information we generated in Step 4.
–DB_NAME
–DB_USER
–DB_PASSWORD
–DB_HOST (If Different)
When completed, do a :wq!

Perfect! You have now successfully finished installing WordPress. If you navigate to your webpage, it should redirect you to the initial configuration page. http://<url>/wp-admin/install.php. It’s a good idea to check the box discouraging search engines from indexing your page until everything is configured the way you’d like.
Optionally, you can install myphpadmin to manage the mysql database from a UI. Be sure to allow your IP address in the phpMyAdmin.conf. Once configured, navigate to http://<url>/phpmyadmin and configure your credentials for access.
Install phpmyadmin and configure
sudo yum -y install phpMyAdmin
sudo vi /etc/httpd/conf.d/phpMyAdmin.conf
sudo systemctl restart httpd.service
Navigate to the next page to configure SSL and HTTPS redirects.


